Premium Analytics Reports
Premium Analytics is a wizard that enables advanced users to create operational reports from all available information in EPIM. The information available includes calculations as well as user, participant, assignee, location, issue type, and other field-level information.
Premium Reports only saves the report settings. The system does not store the report data. Rather, the system pulls the latest information each time that you run the report. Premium Reports contains links to the following types of report settings:
| Report Settings | Description |
|---|---|
| Saved Reports | Reports that you create yourself. When you add reports, you can decide whether only you can view and run the reports or whether you will share the reports with others in your organization. |
| Received Reports | Reports that other users have created and shared with you. |
| Preformatted Reports | Reports that are available to everyone in your organization with access to Premium Analytics. |
Creating a Premium Analytics Report
The report wizard allows you to select the specific case information that you want to see in a report. If you do not want to filter information in a specific category, click Next to skip that page and move to the next category.
Note: Your organization may show the case sections and fields in a different order or may exclude certain sections, so the order and number of pages in the instructions may vary from what you see.
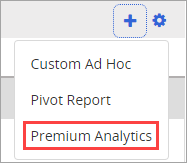
- Select the Analytics tab, click +, and then select Premium Analytics.
- On the Start page, do the following:
- Type a title in the Report name field.
Note: If you type a report name using non-English characters, you must have the language pack for those characters installed on your computer. Otherwise, the ToolTip for that report may not appear correctly.
- (Optional) Type a description of the report.
- For Assigned tier, select one or more tiers.
- (Optional) If your organization has multiple tiers organized in a parent-child hierarchy, click Click to Select Subsidiaries to automatically include all the child tiers in your selected tier.
- For Issue type, select one or more issue types.
Note: If your organization uses subcategories, they appear in the list separated from the issue type by a colon. For example, "Theft : Company asset."
- Click Next.
- On the Snapshot page, click Add Filter next to any of the fields shown, select an option, and then click Next.
Available fields include Date opened, Date closed, Last modified, Status, and Alert.
- On the General Case Info page, click Add Filter next to any of the fields shown, select an option, and then click Next.
Available fields include Data privacy, Received/Reported date, and Alleged incident date.
- On the Case Details page, click Add Filter next to any of the fields shown, select an option, and then click Next.
Available fields include Reporter first name, Reporter last name, Intake method, Location name, Reporter's location, Organization/Building name, Branch Number, City, State/Province, ZIP/Postal code, Country/Territory, Region, Date entered, Legacy date closed, Is the reporter an employee.
Note: In the filter boxes, the options for a filter may appear after you type two or more characters.
- On the Participants page, next to any of the fields shown, select an option, and then click Next.
Available fields include First name, Last name, Participant HRID number, Relationship to organization, Role in this case, Primary result, Secondary result 1, and Secondary result 2.
- On the Synopsis page, click Add Filter next to any of the fields shown, select an option, and then click Next.
Available fields include Primary outcome, Secondary outcome 1, and Secondary outcome 2.
- If your organization uses the EEO/AA feature, select one or more primary Allegation, Allegation 2, and Allegation 3 options.
- If your organization uses custom fields, select information for one or more of these fields.
- On the Choose Columns page, in the Report On list, set the focus of the report, select up to 35 fields that you want to include in the report, and then click Next.
Note: Case Number is always included as one of the columns in a report.
- If you select the Case Notes field, all notes for that case and field are prefixed with the date and the name of the user who recorded the note.
- If your organization uses multiple custom fields with the same name, the name of the duplicate columns names will be indicated with a number after the column heading in the report. For example, Custom Field, Custom Field (1), Custom Field (2), etc.
- Preview the report, and then click Save.
Running a Saved Report
If your access rights, such as which tiers you can view, change between the time that you added the report settings and the time that you run the report, you may not see all the tiers, sections, and columns that you originally selected for the report.
- In the Analytics Reports grid, in the Actions column of the report, click
 .
.
- In the Table section, click a Case Number to view the details of a case.
Copyright © 2025 NAVEX Global, Inc. NAVEX Global® is a registered trademark/service mark of NAVEX Global, Inc. The NAVEX Global® logo is a trademark/service mark of NAVEX Global, Inc. Unauthorized use of NAVEX Global, Inc.’s trademarks/service marks is strictly prohibited without prior written permission from NAVEX Global, Inc.