Add a Third Party
- From the sidebar menu, click Third Parties.
Note: You can click
 in the RiskRate header to hide the sidebar menu and then again to display it (i.e., use as a hide/show menu toggle).
 - In the third party list header, click
 .
.

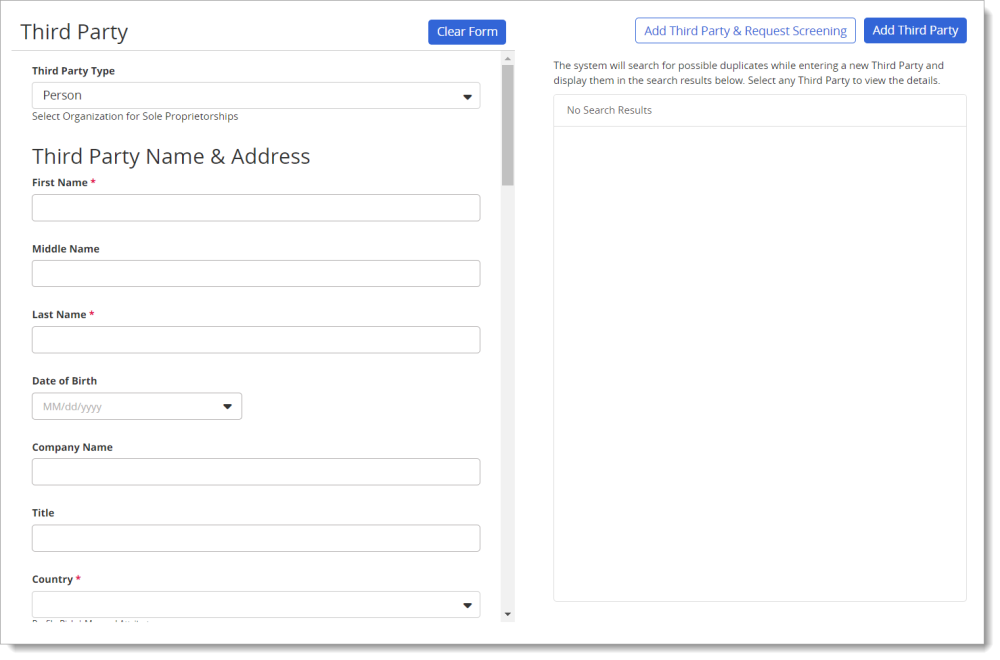
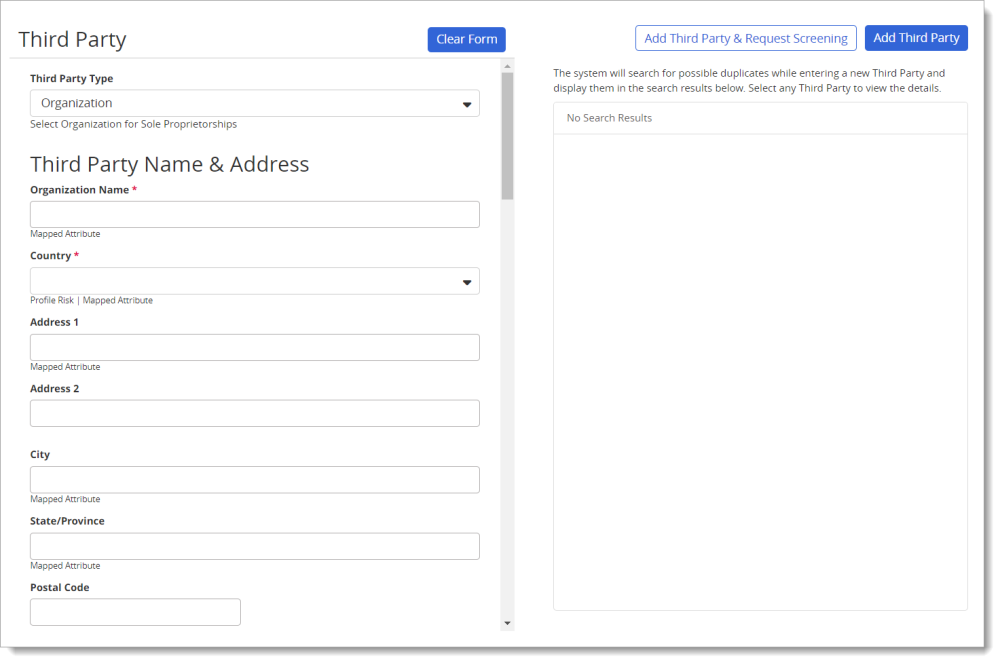
- For Third Party Type, select Organization or Person.
Do one of the following:
- If you selected Person, type the third party's first name, middle name (optional), last name, and the four-digit year of birth (may be required or optional, depending on your RiskRate configuration). You can also type the company or organization the person is a part of and the person's title.
- If you're adding an organization, for Organization Name, type the name of the third party company or organization.
- Our Adverse Media / Sanctions partner indexes their Organization profiles by Latin-based characters only. Additionally, they use a secondary field, called an Alias, that may contain non-Latin-based characters; however, not all profiles contain Aliases in non-Latin-based characters. Names submitted for Organization screening are not transliterated, so a search using non-Latin-based characters will only result in a match if a matching Alias is associated with the Latin-based profile. It is strongly recommended that you provide Latin-based characters when entering the name of an Organization.
- If you are unable to submit Organization names in non-Latin-based characters (for example, Chinese, Arabic, Cyrillic, etc.) and wish to do so, contact NAVEX Customer Support by submitting a request in the Community for assistance.
- RiskRate searches against existing third-parties for possible duplicates. If any are found, they will appear in the search results panel on the right or below the Additional Information section (depending on your screen's resolution). You can click on any of these potential duplicates to view that third party's details.
- Select the organization's or person's country.
- Click in the Country box and start typing to see a list of matching countries.
- For Level 2 users who have been restricted to seeing information for only those third parties in specific countries, regions, or categories, Country and Category options may be limited.
- (Optional) Fill in the address information.
Note: If you selected United States of America or Canada as the third party's country, you must at least select a state or province.
- For Owner, select the RiskRate user who is primarily responsible to manage this third party.
Note: The Owner list consists of all Level 1 users plus all Level 2 users who are not restricted from accessing this third party.
- (Optional unless Required) Assign a user as an approver for this third party.
- The Approver list consists only of those users for whom the May be assigned as Approver check box has been selected. The Owner list consists of all Level 1 users plus all Level 2 users who are not restricted from accessing this third party.
- Your organization can be set up to have Approver Email as required. It is not required by default. Contact NAVEX Customer Support by submitting a request in the Community if you wish to have this be a required field.
- (Optional but highly recommended) Type a third party ID, which must be unique among all third parties.
- Your RiskRate system may be configured to automatically generate IDs for all third parties as they are added. If this is the case (check with your organization's RiskRate expert if you're not sure), you can leave the Third Party ID field blank to have the ID automatically generated when you save the new third party, or you can type an ID to override automatic generation.
- If you use the Batch Upload feature to import information for multiple third parties at once (see Perform a Batch Upload of Third Parties) and RiskRate is not configured to automatically generate third party IDs, it is imperative that you include an ID both when creating a third party manually and when including third party information as part of a batch upload. When processing a batch upload, RiskRate uses the third party ID to check for existing third parties in order to avoid creating duplicates and to enable the updating of existing third party information.
- Under Additional Information, fill in at least any required fields.
- Approval Status: The status of your organization's approval process for this third party.
- Billed To: Captures business unit(s) for billing purposes, so customers can designate which of their internal business units should be billed for RiskRate activity. This field is not enabled by default. Contact NAVEX Customer Support by submitting a request in the Community if you wish to enable this field.
- Branch/Division: Your organization's branch or division that manages this third party relationship.
- Business Registration Number: Unique number assigned to this third party by a government authority for the purpose of identification.
- Category: How you classify this third party, such as supplier, agent, or distributor.
- Contract Amount: The value of the contract between your organization and this third party.
- Contract Expiration Date: When the contract expires.
- Financial Risk: Are there are known financial risks, such as a previous bankruptcy filing, associated with this third party?
- ID Number: Unique number assigned to this third party by your organization or by a government authority for the purpose of identification.
- Interacts with Government Entities: Does this third party interact with government entities?
- Internal Department: The department in your organization that manages this third party relationship.
- IT Security Risk: Does this third party represent an IT security risk?
- Ownership by a Public Official: Is this third party entirely or partially owned by a public official?
- Start Date of Relationship: Date when the contract with this third party started.
- State Owned Entity: Is this third party entirely or partially state-owned?
- Subsidiary/Parent: Your organization's subsidiary or parent that manages this third party relationship.
- Tax ID: Unique number assigned to this third party by a government authority for the purpose of identification.
- Third Party Payment Type: How payments are made between your organization and this third party.
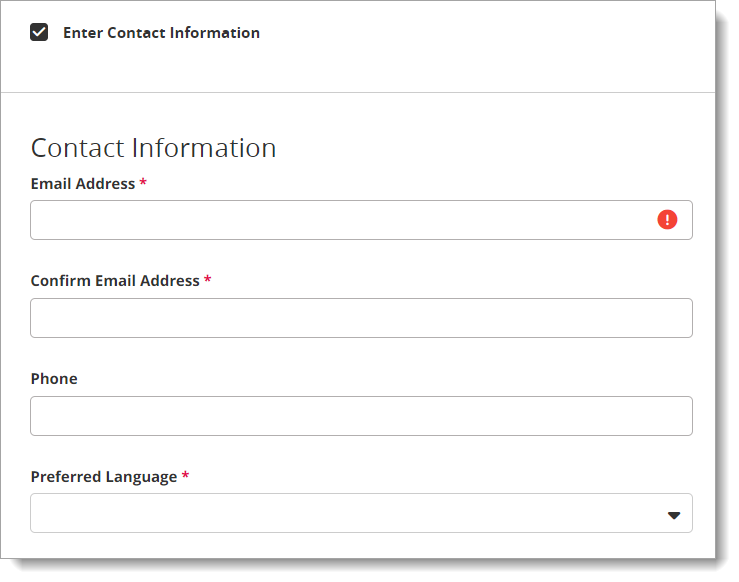
- (Optional) To add information about this third party's primary contact, select the Enter Contact Information, check box, and then do one of the following:
- If you're adding an organization, fill in at least the Email Address, Confirm Email Address, First Name, and Last Name fields, and select the contact's preferred language.
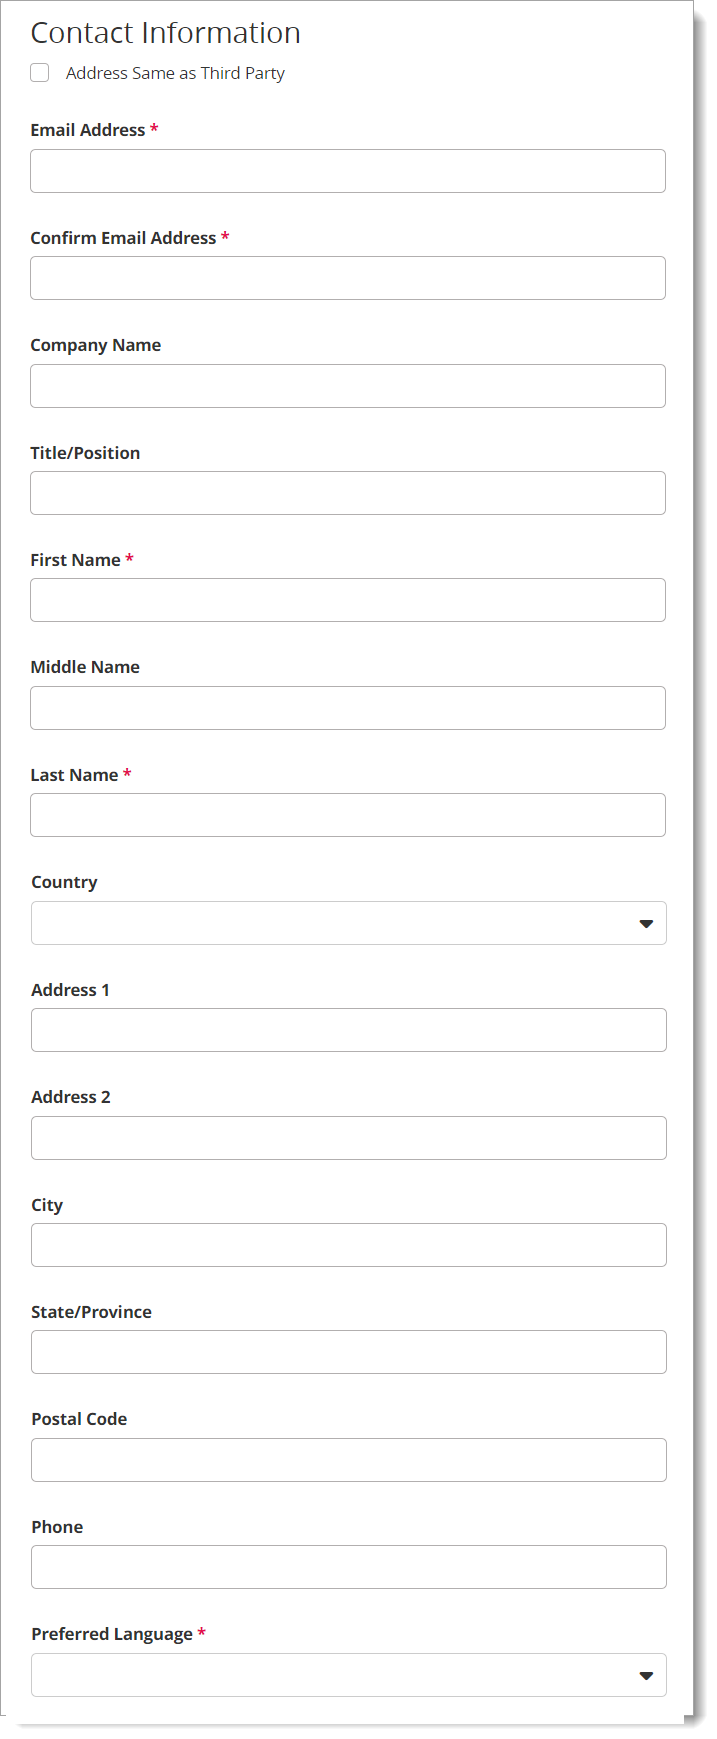
Note: To use the same address information for this contact as you added for the third party above, select the Address Same as Third Party check box.
- If you're adding a person, fill in at least the Email Address and Confirm Email Address fields, and select the contact's preferred language.
Note: You can also add contact information anytime after adding the third party.
- Click Add Third Party to only add the third party, or click Add Third Party & Request Screening if you would also like to request a screening.
Note: If your organization has a business rule to automatically request a screening for all new third parties or when an initial profile risk is calculated, and Add Third Party & Request Screening is selected, a message will appear to avoid duplicate screenings. (See Business Rules for more information). Click Cancel to add the third party without the screening or Continue to proceed with the screening (see Request a Screening for instructions on completing the request).
- Once the third party has been saved, you can do any of the following:
- Click Clear Form to start adding another third party.
- Click View Detail to display this third party's detail page, where you can view the status of requested reports, upload externally completed reports, add notes, and upload other related files (see Use the Third Party Details Page).
|
Notes: |
|
Notes: |
|
Notes: |
|
What you should know about third party IDs: |
|
Note: RiskRate can be configured to include any of the following optional Additional Information fields, each of which may or may not be set as required. In addition to these standard attribute fields, Enterprise customers can have additional custom attributes defined. |
Copyright © 2024 NAVEX Global, Inc. NAVEX Global® is a registered trademark/service mark of NAVEX Global, Inc. The NAVEX Global® logo is a trademark/service mark of NAVEX Global, Inc. Unauthorized use of NAVEX Global, Inc.’s trademarks/service marks is strictly prohibited without prior written permission from NAVEX Global, Inc.